Before you start
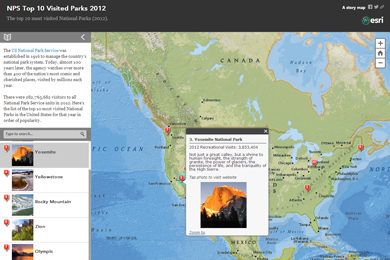
The Story Map Playlist℠ app template presents a set of point features, usually from a CSV file that has been uploaded into an ArcGIS Online web map, as an organized interactive list. Your audience can explore the points from the map or click a corresponding item in a list.
To create a playlist, you'll create a web map containing your points, install the template on a publicly accessible website or web server, and configure the template to point to the web map you created.
Follow the steps below to create your playlist. If you need help, see the README PDF file that comes with the template download.
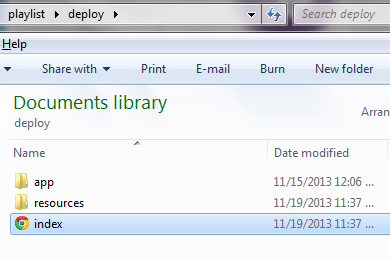
Download the Playlist template. The app template is downloaded as a ZIP file. Extract all the contents into a folder in your inetpub \wwwroot folder or a local testing server. Later, to complete the story map, edit the index.html file.
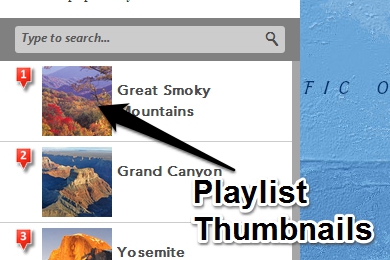
For each location on your map, you need a photo or graphic to use as the thumbnail in the list. The size of the thumbnail is 70 by 70 pixels. Larger thumbnails resize automatically to fit. To optimize your story map, keep the file size to a minimum, and keep a square format to avoid cropping.
Once you name and edit your photos, upload them to your web location so they can be referenced in the application via their URL.
You can use a comma-separated value (CSV) file, shapefile, or feature layer to add playlist locations to your web map, and store other information used by the template and pop-up.
There are several required and optional fields to insure the Playlist app reads your data correctly:
- Name—The name for the playlist item in the side panel. If the Name field is not found, the app uses the first text attribute.
- Thumb_URL—URL location of the image used as the side panel thumbnail. If not present, the app looks for the first attribute that has a string with an image type as a file extension (.gif, .jpg, .png, and so on).
- Color—Use if more than one icon color is desired. Using “b” displays a blue icon, “g” displays a green icon, “p” displays a purple icon; otherwise, red is used. If the field is not present, all icons are red.
- Order—The order the locations appear in the application list, and also the number that appears on the map icon. This is optional and is only needed if overwriting the default order (for example, you want the 5th item to be numbered as 2); however, it’s a good idea to use this field even when not changing the order. Just keep things neat and easy to understand.
- Filter—An optional field that can be added to your data to extend the built-in search capabilities. If the data has a filter field, the app adds a new filter option for each unique value in this field.
If you're using a preexisting point layer, these field names can be modified to fit your data in the configuration below.

Create a new web map in ArcGIS Online, and drag and drop the completed point file onto the map. Alternatively, click Add, and click Add Layer from File to add the point file. Change the basemap, and add additional layers as desired.
Symbols used in your web map are ignored by the Playlist template. A colored icon with the order number is automatically substituted. Since the map can be publicly discovered outside the context of the Playlist app, it’s a good idea to follow best practices and author a complete and well-documented map.
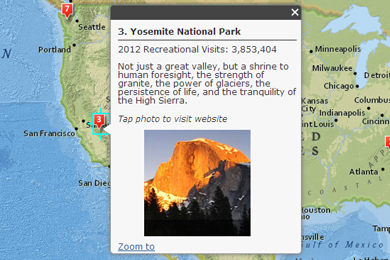
Configure the pop-ups to make them easy to read and engaging to your audience.
Zoom to where you want your initial map extent to be, and save your map.
By default, the title of your map item is used as the title of the app. The item summary becomes the subtitle, and the map item description appears in the top left panel. These can be overridden by editing the index.html (see step 5 below).
Be sure to share your map publicly when finished.
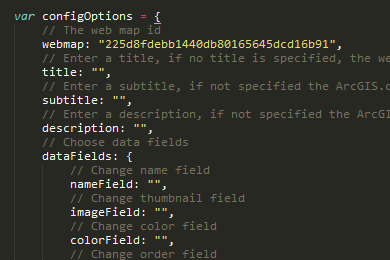
Using any text editor, open the index.html file (see step 1), and scroll down toward the bottom where you'll see the configOptions. Change the following options to match your data:
- webmap—Replace the current web map ID with the ID of the web map you just created.
- title/subtitle/description—Optionally, add text to override the web map's title, subtitle, and description that was saved on ArcGIS Online.
- dataFields—If any of the field names in your point layer do not match those listed in step 3, add the new name to its corresponding option.
- layerTitle—Add a name for your playlist point layer to use in the legend.
- visible—Choose to display your playlist point layer in the legend (true or false).
- items—For each item, choose to display the item in the legend with the visible option (true or false) and the name used in the legend with the name option.
Copy the contents of the Playlist template download onto a publicly accessible website or web server. This can be a web server that you or your organization maintains, or it can be a folder on a shared or hosted web server that you use for your website. In an enterprise situation, you can have a system administrator load the files onto a server. The location of the template's index.html file on your website or web server defines the URL that's used to access your playlist.
Congratulations, your Playlist is now operational.