Before you start
To create a Crowdsource story the main thing you need before you start is an idea that will engage people!
It's important to note that Story Map Crowdsource is different from the other Story Maps apps in that it enables people to post pictures and information onto your map. Unlike the other apps, where you do all the authoring, you don't have complete control over what content appears in your Crowdsource story. You'll need to review contributions to check for inappropriate or unwanted posts, and you also need to consider privacy issues. For example, a contributor's current location, such as their current street address, can be exposed in a Crowdsource story, and appear with their post on your map both as a point location and as text. This is OK if your story is soliciting contributions about, say, great places to visit in a city, where that location is a public place and you want that place's location to appear on your map. But it may not be desirable for other subject matter, especially if people may be posting onto your Crowdsource story from their home. It is up to you as the author of a Story Map Crowdsource story to ensure that your application complies with the privacy and data collection policies and standards of your organization, your community, and your intended audience. We recommend that you set up a limited pilot or internal test of any Story Map Crowdsource project before deploying and promoting a Crowdsource story publicly, in order to review if it meets those requirements.
You also need to use an ArcGIS subscription account with publishing privileges in order to create a Crowdsource story. This is because behind the scenes, the content people contribute to your story is automatically stored in a service that the Crowdsource app creates and manages for you. Services can't be created at the ArcGIS public account level.
If you are using a free ArcGIS public account you'll need to upgrade to an ArcGIS subscription in order to make a Crowdsource story (see our Resources page for details about getting accounts). If you are not sure which account you have, the Crowdsource Builder will check your account when you launch it and will let you know if you can't build a story.
Get tips about how to create a great Crowdsource story.
Start the Story Map Crowdsource Builder. You have to use an ArcGIS subscription account to create a Crowdsource story.
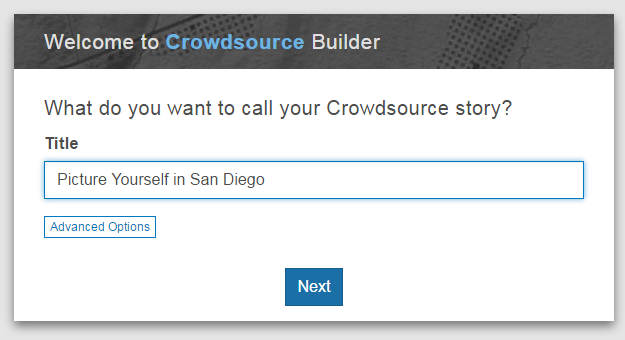
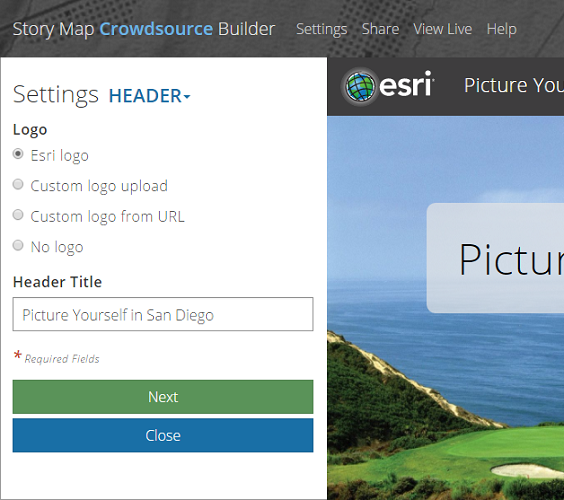
Enter the title for your story. This title will appear on your story's cover page.
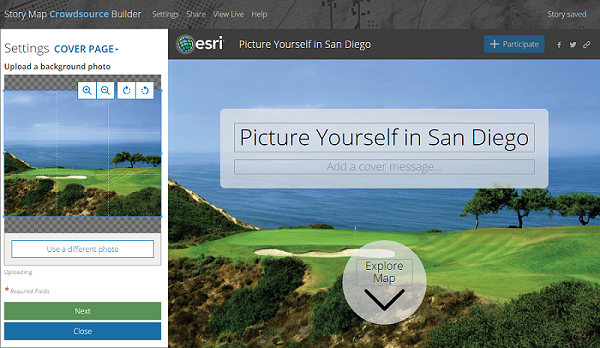
The Crowdsource Builder opens showing your cover page with a placeholder cover photo. In the Settings dialog on the left you can upload your own cover photo. You can also edit the text on the cover page, including the cover message under the title, and the text above the arrow at the bottom of the page that takes people to the map.
In the Settings dialog, choose Contributions from the dropdown list. Here you can control how your participants will contribute to your story and how you want to review their contributions.
By default, contributions from your participants will appear on your story immediately. You will still be able to review their contributions and remove unwanted or inappropriate ones, but only after they have been added to your story. This gives your story immediacy because people will see their contribution on your story as soon as they post it. But it does mean that any questionable contributions will appear on your story for everyone to see until you remove them.
For a more conservative approach, choose the Show contributions > After review option. This lets you review contributions before they appear on your story. Only contributions that you approve will appear. This not only lets you guard against unwanted or questionable contributions, it is also useful if you want to choose among the incoming contributions for editorial purposes, such as choosing just the best ones.
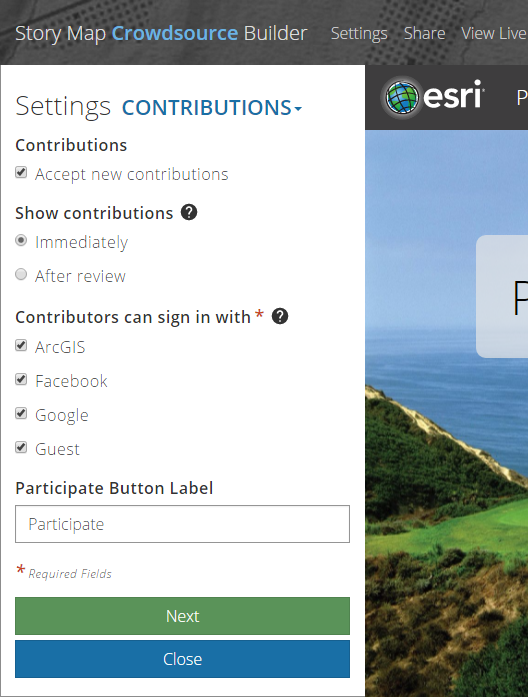
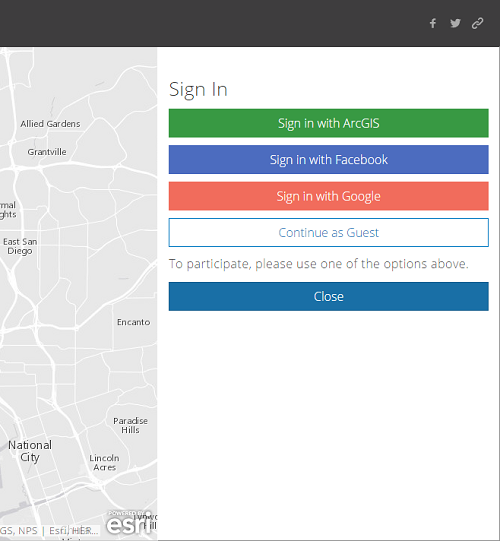
In the Contributions panel in the Settings dialog you can also choose which sign-in options participants will be given when they post a contribution to your story. For example if your Crowdsource app is only going to be accessed by people inside your organization, you may want to remove social media and guest sign-in to ensure that they use their ArcGIS accounts.
When someone clicks the Participate button in your story, they'll be prompted to sign-in and the options you chose will appear as buttons, as shown in the screenshot here.
Tailor the header at the top of your story. In the Settings dialog, choose the Header panel. Here you can customize the logo that appears in the header. You can upload your own logo and specify a URL that users will be taken to when they click your logo. This is an important customization to make because it adds authority to your work, shows people who created the story, and lets them click your logo to go to your organization's website, or a web page related to the subject of your story, to get more information.
The Social Sharing panel in the Settings dialog lets you configure the sharing buttons in the top right corner of your story. For example you can put your organization's Twitter account name into the 'Who to follow' suggestions box. In this way, when someone tweets your story using the Twitter button in your story's header, that person will also see an option they can click to follow your organization's Twitter feed.
You are almost done! Now you can configure your map.
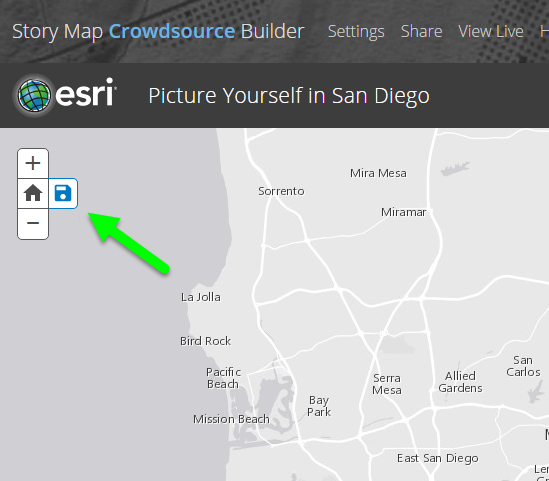
Specify the home map location for your story. This is the area on the map that your audience will see initially when they launch your story. It is also the area they will go to if they press the Home button in the navigation controls in the top left corner of the map. To set the home location, first navigate in the map to the area you want to use. Then press the button next to the navigation controls to store the current area as the home location.
As a finishing touch, click Settings and in the Header panel upload your organization's logo so it appears in your story's header. You can also specify a URL that people will get taken to if they click on your logo. Adding your own logo adds authority and branding to your story.
Your Crowdsource story is done and ready to share!
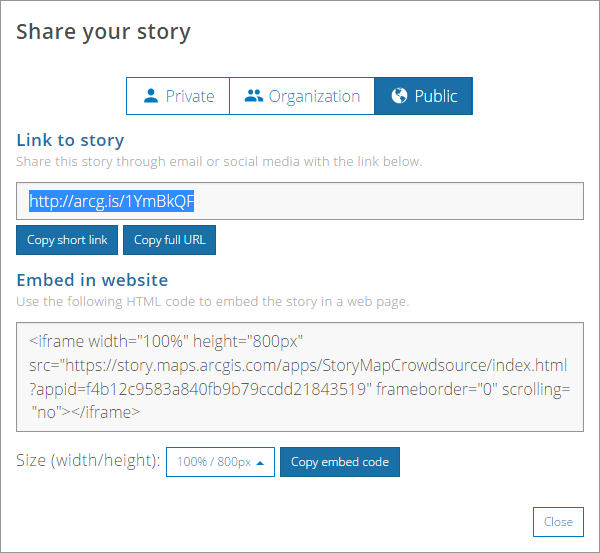
Press the Share button at the top of the Crowdsource Builder. In the Share dialog you can choose to share your story publicly or just within your organization. Use the Organization option if you only want members of your organization to be able to view your story.
Congratulations, your Crowdsource story is now operational! You can now promote it and start collecting contributions.
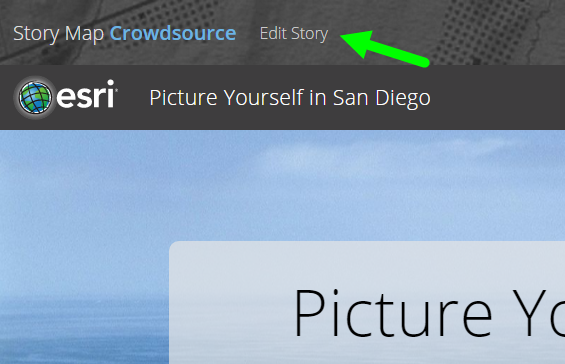
To make further changes to your story and start reviewing the contributions you receive, you can launch it and click the Edit Story button you'll see in the strip at the top of the screen. (That strip is only present when you are signed in to ArcGIS with your account: other people won't see it).
To manage your Crowdsource story, go to the My Stories section of this website. My Stories lists all the story map apps you have created that are hosted in ArcGIS Online. It lets you edit your stories, review their content, check them for issues, upload thumbnails for them, etc.
You can also access your Crowdsource story from My Content in ArcGIS Online or your organization's ArcGIS portal. In My Content you will also see entries for the feature service and the web map that the Crowdsource app created and manages for you. The Crowdsource app stores the contributions to your story in the feature service, and the web map contains that feature service.
You can review the contributions that people post to your story.
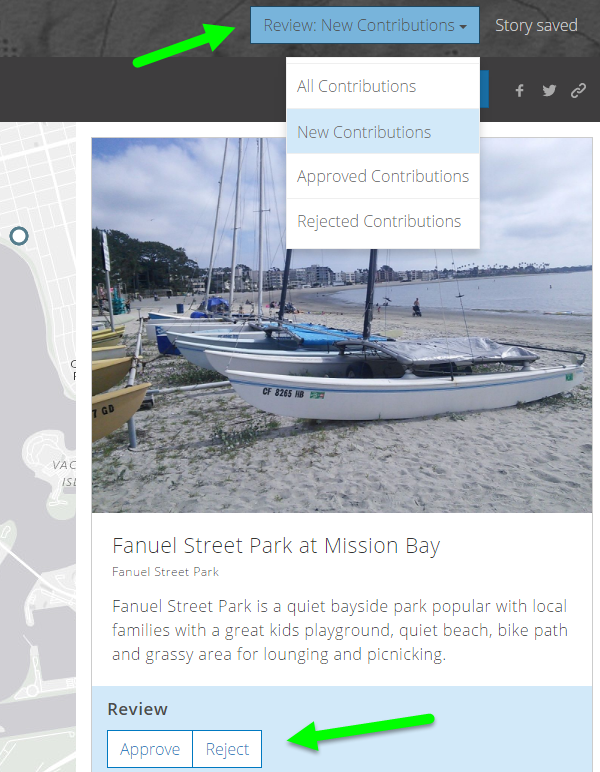
To review contributions, proceed past the cover page after opening your story in the Crowdsource Builder. You'll see the Review button in the header at the top, and it will default to show you new contributions to your story. You can click on individual contributions to approve or reject them. In step 4 above you chose between two options: having contributions appear in your story immediately or having them only appear when you have approved them. If you are using the first option, New Contributions shows you what participants have added to your story recently. If you are using the second option, New Contributions shows you new posts that are awaiting your approval to be added.
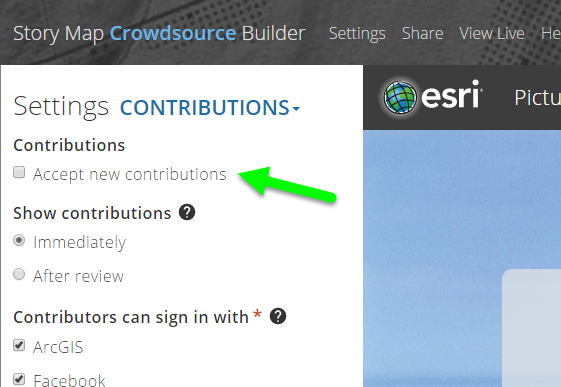
After a period of time, you may want to close your Crowdsource story to new contributions. For example your story may be aimed at people attending an event and you want to stop accepting new contributions once the event has finished.
To close your story to new contributions, open it in the Crowdsource Builder, click Settings and in the Contributions panel, uncheck Accept new contributions. When you are no longer accepting contributions, your story can still be accessed so that people can see what it contains, but the Participate button won't be present. You can start accepting contributions again at any time if you wish.
There may be a time when you want to shut down your Crowdsource story so it can no longer be viewed. For example your story may be designed to be accessed only during the lifespan of a particular outreach campaign. To take your story offline, open it in the Crowdsource Builder, click Share, and set its sharing level to Private. You can also decide what you want to do with the service and web map in which the contributions are stored. For example you might want to keep them as an archive of that content, or use them in a different application.
That's it! We can't wait to see how you put Story Map Crowdsource to work!